Understanding WordPress Memory Limits
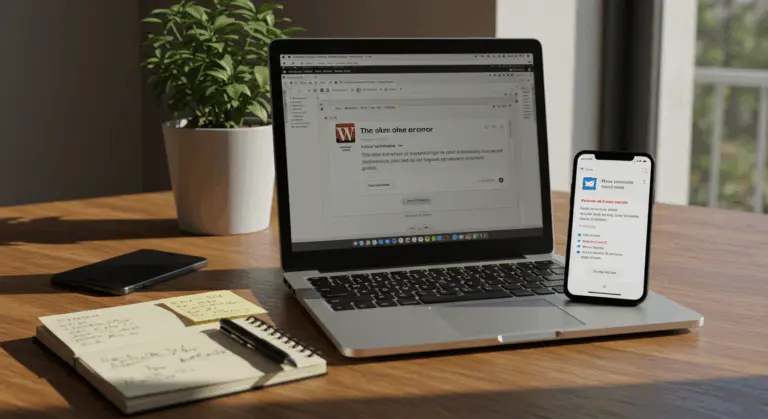
WordPress typically defaults to a 40-64MB memory limit, though hosting providers often configure this differently. This represents the maximum PHP memory your site can consume. When exceeded, it causes the ‘memory exhausted’ error—a site-breaking issue that can crash functionality entirely.
To check your current PHP memory limit, navigate to the WordPress Site Health tool (Tools > Site Health > Info), where you’ll find the value listed under the ‘Server’ section. Alternatively, explore your hosting control panel’s PHP settings or deploy an information plugin for quick diagnostics.
While WordPress may default to as low as 32MB, this is insufficient for modern sites. Industry experts recommend at least 128MB for basic installations. Complex sites with numerous plugins or high traffic? They demand 256MB or more.
Common Causes of Memory Exhaustion on WordPress
Memory exhaustion strikes when your site demands more PHP memory than the server permits, causing the “Fatal error: Allowed memory size of X bytes exhausted…” message that affects WordPress sites.
Common causes include:
-
Resource-Intensive Plugins: Page builders, backup tools, and complex form builders are frequent culprits.
-
Poorly Optimized Themes: Themes with bloated code can consume excessive memory.
-
Heavy Media Use: Pages with numerous high-resolution images or videos.
-
Intensive Processes: Bulk operations like large data imports/exports or mass post updates.
-
Complex E-commerce: Large WooCommerce stores with many products and operations.
-
Plugin Conflicts: Multiple plugins that duplicate functionality or conflict with each other.
How to Increase the WordPress Memory Limit
Increasing your WordPress memory limit is often necessary to resolve these errors. Several methods exist, each tailored to different technical requirements and hosting environments.
Before making any changes, backing up your website is absolutely crucial. Keep in mind: increasing the memory limit addresses symptoms, not the underlying cause of excessive memory consumption.
Here are four proven methods. Since hosting environments vary dramatically, try them sequentially. Lack the necessary file permissions or encounter a failed method? You’ll need to contact your hosting provider directly.
Method 1: Edit the wp-config.php File
Editing the wp-config.php file is the most direct and effective method to increase your WordPress memory limit. Why? This file houses your site’s core configuration settings, giving it ultimate authority over memory allocation.
Access your site’s files via FTP, SFTP, or your host’s file manager, then locate wp-config.php in the root directory. Critical step: always back up this file before making any edits.
Open the file and add the following code just before the /* That's all, stop editing! Happy blogging. */ line:
define('WP_MEMORY_LIMIT', '256M');
This code establishes a 256MB memory limit. Feel free to adjust this value based on your needs—whether that’s 128M, 512M, or beyond. Save the file and upload it back to your server, replacing the original.
For additional performance improvements, you can also add the following lines in the same location:
@ini_set('upload_max_file size', '64M');
@ini_set('post_max_size', '64M');
@ini_set('max_execution_time', '300');
These additional settings boost upload file size limits and extend maximum script execution time. This provides better protection against timeouts during resource-intensive operations.
Method 2: Modify the.htaccess File
When editing wp-config.php doesn’t work, modifying the .htaccess file offers a viable alternative. This powerful file can override server configurations, including those stubborn PHP memory limits.
To modify your .htaccess file, connect to your website via FTP or your host’s file manager. You’ll find the.htaccess file in your WordPress root directory—the same location as wp-config.php.
Back up the file, then open it and add the following lines at the very top:
php_value memory_limit 256M
php_value upload_max_file size 64M
php_value post_max_size 64M
php_value max_execution_time 300
php_value max_input_time 300
This method typically succeeds on Apache servers but doesn’t work on NGINX or PHP-FPM setups. A 500 Internal Server Error signals incompatibility—if this occurs, restore your .htaccess backup immediately to prevent site downtime.
Method 3: Adjust Settings in php.ini
Modifying the php.ini file directly alters server-level PHP settings. This works well when you possess server access or your host permits custom php.ini files.
Check for an existing php.ini file in your WordPress root directory. Not there? Create a new one from scratch.
Add the following lines to the file:
memory_limit = 256M
upload_max_file size = 64M
post_max_size = 64M
max_execution_time = 300
max_input_time = 300
Save the file and upload it to your WordPress root directory. Creating a new file? Ensure it’s named exactly ‘php.ini’—no additional extensions or creative variations.
On some hosts, particularly those running PHP-FPM, you may need to use a .user.ini file instead. The content remains identical; only the filename changes.
If this method fails, or you lack permissions, you will need to contact your hosting provider for assistance.
Method 4: Use Your Hosting Panel
Many hosting providers offer intuitive control panels to adjust PHP settings without the complexity of direct file editing. This is often the easiest approach for users who prefer not to edit files manually.
Log into your hosting account and find the PHP settings, often labeled ‘PHP Configuration,’ ‘Select PHP Version,’ or ‘MultiPHP Manager’. The exact location varies by provider:
-
cPanel: Look for ‘MultiPHP INI Editor’ or ‘Select PHP Version’.
-
Plesk: Navigate to ‘PHP Settings’ under your domain.
-
Kins ta: Use the ‘Tools’ section in the Mainstay dashboard.
-
Site Ground: Go to ‘Site Tools’ > ‘Devs’ > ‘PHP Manager’.
Once you’ve located the PHP settings section, seek out the memory_limit option and increase it to your desired value (typically 256M or higher). Many hosting panels conveniently allow simultaneous adjustment of related settings like max_execution_time, upload_max_file size, and post_max_size.
Can’t find or modify these settings? Contact your host’s support team. They can either adjust the limit directly or clarify your plan’s restrictions—some shared hosting plans impose fixed caps that require an upgrade to surpass.
Proactive Measures to Optimize Memory Usage
While increasing the memory limit provides immediate relief, proactive optimization is a better long-term approach. The following measures actively reduce memory consumption while boosting overall site efficiency.
-
Conduct a Plugin Audit: Deactivate and remove unused plugins. Replace resource-heavy plugins with lighter alternatives, using tools like Query Monitor to identify culprits.
-
Optimize Images: Compress and correctly size all images before uploading. Use plugins like Smash or Short Pixel and enable lazy loading to reduce initial memory load.
-
Implement Caching: Use a caching plugin (e.g., WP Rocket, W3 Total Cache) to create static versions of your pages, which drastically reduces PHP processing and memory usage.
-
Maintain the Database: Regularly clean up post revisions, spam comments, and transients using plugins like WP-Optimize to prevent database bloat.
-
Evaluate Your Theme: Switch to a lightweight, well-coded theme. If using a page builder, ensure it is performance-optimized and only load necessary elements.
Conclusion: Managing WordPress Memory Limits Effectively
Effective WordPress memory management combines immediate fixes with proactive strategies that ensure long-term stability and peak performance.
The methods we’ve explored—from editing core files like wp-config.php to modifying server configurations via .htaccess or php.ini, or leveraging your hosting panel—provide solutions tailored to different technical comfort levels and diverse hosting environments.
Keep in mind that increasing the limit is often just a temporary fix. For genuine long-term health, implement comprehensive optimization strategies like plugin audits, image compression, caching, and database maintenance to shrink your site’s memory footprint.
A memory limit of 128MB to 256MB works well for most sites. Complex e-commerce platforms or membership sites? They may demand 512MB or more. Monitor your site’s performance consistently to discover the optimal balance.
If issues persist despite your efforts, consult a WordPress developer for a comprehensive performance audit. Proper memory management is essential for keeping your site stays fast and reliable for every visitor.